# openHABian - Hassle-free openHAB Setup
You just discovered openHAB and now you are eager to start but you're afraid of setting up a standalone system for it?
openHABian is here to help.
# Features
openHABian is a self-configuring Linux system setup to reliably operate your openHAB instance 24 hours a day.
A fresh install provides:
- Complete SD-card images pre-configured with openHAB for the Raspberry Pi line of small single-board computers
- The openHABian configuration tool to set up and configure openHAB and many related things on any Debian based system
- Fully automated hassle-free setup without a need for a display or keyboard, connected via Ethernet or Wi-Fi (see networking)
- Samba file sharing pre-configured ready to use shares
- ZRAM (opens new window) to reduce wear on SD cards
With many more optional features available in the openhabian-config menu.
# Getting Started with openHABian
openHABian is for starters and expert users. openHABian provides a solid base for openHAB and can be configured in any number of ways after the initial install. We suggest that users keep the packages on the system all openHAB related, this will help keep the system as stable as possible.
This advice works well with the idea of a single board computer (SBC) as they are meant to cheap and affordable to be used for a single purpose. Therefore our recommendation is to dedicate a single system (typically a Raspberry Pi) to your openHAB instance and any related software.
With that being said, we can't and won't stop you from doing whatever you want, but don't say we didn't warn you.
# Hardware
# Hardware Recommendation
Let's put this first: You can run openHABian on any system with a native Debian Linux distribution. Any old x86 server or desktop system will do, all you will need is 1 GB of free RAM. Used laptop systems are great because of the backup capabilities that the integrated battery provides. While you can install additional software on top of an openHABian server, we recommend against doing so. Run your home automation on a system that you dedicate to this task and prepare to run it 24 hours a day, 7 days a week. Our current recommendation is to get a RPi model 4 or 5 with 2 or 4 GB of RAM, whatever you can get hold of for a good price, plus an "Endurance" SD card. If you want to be on the safe side, order the official 3A power supply, else any old mobile charger will usually do. Cards named "Endurance" can handle more write cycles and will be more enduring under openHAB's use conditions. Prepare to make use of the SD mirroring feature, get a 2nd SD card right away, same model or at least the size of your internal one, plus a USB card reader.
# Hardware Support
The openHABian image supports all Raspberry Pi models.
Running in 64 bit on ARM has one major drawback: increased memory usage. That is not a good idea on heavily memory constrained platforms like older Raspberries. Ensure your RPi has a minimum of 2 GB. For older hardware, you can attempt to use the 32 bit image we still provide, it should work but we do not support running openHAB 5.
openHABian can run on x86 based systems but you will need to install the Debian OS yourself. See installation on other Linux systems for directions on what to do. On x86 hardware, it's all 64 bit but that in turn once more increases memory usage. A NUC to run on should have no less than 4 GB, 8 are better.
All other system combinations do not have official support. We do not actively prohibit installation on any hardware, including unsupported systems, but we will not offer support for any issues you encounter.
We strongly suggest that you stay with a supported version. This will help you and those you will want to ask for help on the forum focus on a known set of issues and solutions.
# 32/64 Bit Image Support
openHAB 5 requires to run on a 64 bit OS and Java 21 version so the recommended openHABian image is the 64 bit version.
Many RPi users are still on a 32 bit based Linux OS (you can check bitness using the command getconf LONG_BIT).
You can temporarily use the 32 bit version if you want to stay with openHAB 4 or if you cannot upgrade your HW or OS at the very moment, BUT ATTENTION: RUNNING openHAB 5 on any 32 bit OS image IS NOT SUPPORTED ANY MORE. You will be having issues with some functions like JS Scripting. Reinstall your OS to 64 bit or stay with openHAB 4. Should you decide to upgrade, check the openHAB 5 release notes how to export/backup your config and install a fresh system. https://github.com/openhab/openhab-distro/releases/tag/5.0.0#openhabian (opens new window)
# Installation and Setup
# Networking
You need to connect your Raspberry Pi to the network by Ethernet or configure Wi-Fi settings before first boot. If you plan on using Wi-Fi see first boot configuration for how to configure those settings.
If we fail to connect to any networks on first boot, we will try to open a Wi-Fi hotspot that will allow you to connect your Raspberry Pi to Wi-Fi from another device. The hotspot is temporary and will close once the Wi-Fi connects successfully. If connection fails the hotspot will return for you to try again.
# Wi-Fi Hotspot
When your openHABian box does not get Internet connectivity through either Ethernet or Wi-Fi (if configured), openHABian will launch a hotspot.
Use your mobile phone to scan for Wi-Fi networks, you should be seeing an new unprotected network called openHABian-<n> with <n> being a digit.
Once connected, most smartphones will transfer you to a web page.
If this does not happen on your mobile device, open your browser on the mobile and point it at http://raspberrypi.local (opens new window).
If you cannot connect to this address, go to http://10.41.0.1 (opens new window).
On that page you can select the SSID of the network you want to connect your system to. Provide the password and submit it be aware that as soon as you do, the system will immediately stop the hotspot and attempt to connect to the specified network. As such your browser will be unable to provide any indication of if the operation succeeded.
Try to ping the new system's hostname (default is openhabian) or check DHCP on your router to see if your openHABian system appeared there.
You can use sudo comitup-cli inside openHABian to change networks and eventually remove network credentials.
Note that the hotspot will remain on standby and will show up again every time your wlan0 interface is losing connectivity.
For more information on the hotspot functions see comitup documentation (opens new window).
Most behavior can be tweaked by setting parameters (such as a default password) in /etc/comitup.conf.
The hotspot feature is known to work on RPi3 and newer but can expose problems when used with USB Wi-Fi adapters.
# Installation on Raspberry Pi Systems
Flash, plug, wait, enjoy:
The provided image is based on Raspberry Pi OS Lite (opens new window) (previously called Raspbian). openHABian is designed as a headless system, you will not need a display or a keyboard. On first boot, the system will set up openHAB, its tools and settings. Packages will be downloaded and configured in their newest version. The whole process will take some time and if all goes well openHAB will be setup and ready to go without needing any additional configuration.
Installation:
- Make sure you meet the hardware prerequisites first
- Write the image to your SD card
- Use the official Raspberry Pi Imager (opens new window) select: 'Other specific-purpose OS -> Home assistants and home automation -> openHAB'
- Alternatively download the latest release from here (opens new window) and flash using a tool like Etcher (opens new window)
- Change any settings you want (see first boot configuration)
- Insert the SD card into your Raspberry Pi
- Prepare whatever networking you need (see networking)
- Power on and wait approximately 10-30 minutes for openHABian to do its magic
- You can watch the install progress in your browser at http://openhabian:81 (opens new window) or whatever your IP address is if the hostname does not work
- If for whatever reason networking does not work, openHABian will launch a hotspot
- Connect to the openHAB UI at http://openhabian:8080 (opens new window) and make your home smart
- If you encounter any issues, see troubleshooting
When openHABian has installed and configured your openHAB system, you can start to use it right away.
# Installation on Other Linux Systems
You can install openHABian on x86 hardware on top of an existing Debian installation. Please note that the install process is tailored to work for RPi systems. We cannot test systems outside of RPis upfront so there may be some issues we cannot anticipate that come up.
Although the core parts of openHABian were reported to work on Ubuntu, it is not supported and untested. If you try and fail, please help and drop us a note on GitHub with debug log enabled, see troubleshooting.
Start with a fresh installation of Debian, login and run:
# start shell as root user
sudo bash

# install git - you can skip this if it's already installed
apt-get update
apt-get install git

# download, link and create config file
git clone -b openHAB https://github.com/openhab/openhabian.git /opt/openhabian
ln -s /opt/openhabian/openhabian-setup.sh /usr/local/bin/openhabian-config
cp /opt/openhabian/build-image/openhabian.conf /etc/openhabian.conf
Edit /etc/openhabian.conf to match your needs (see first boot configuration).
To start the openHABian setup process run:
openhabian-config unattended
When openHABian has installed and configured your openHAB system, you can start to use it right away.
# Failed Installs
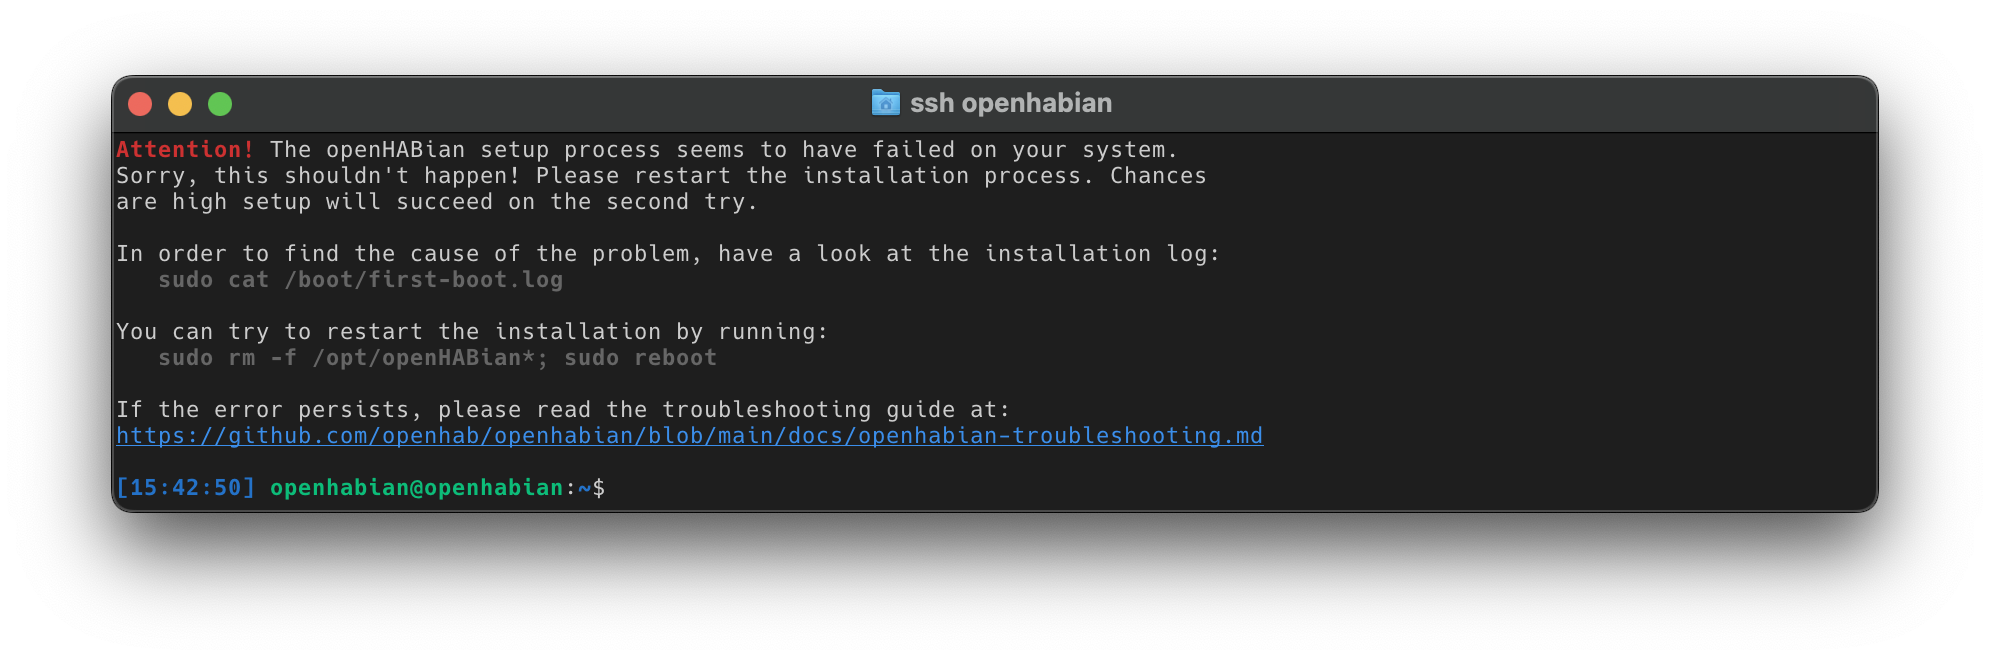
If you see something like this image when you try to log in, we're sorry! We hoped this would never happen, please jump over to openHABian Troubleshooting and start there for next steps.
# Going further with openHABian
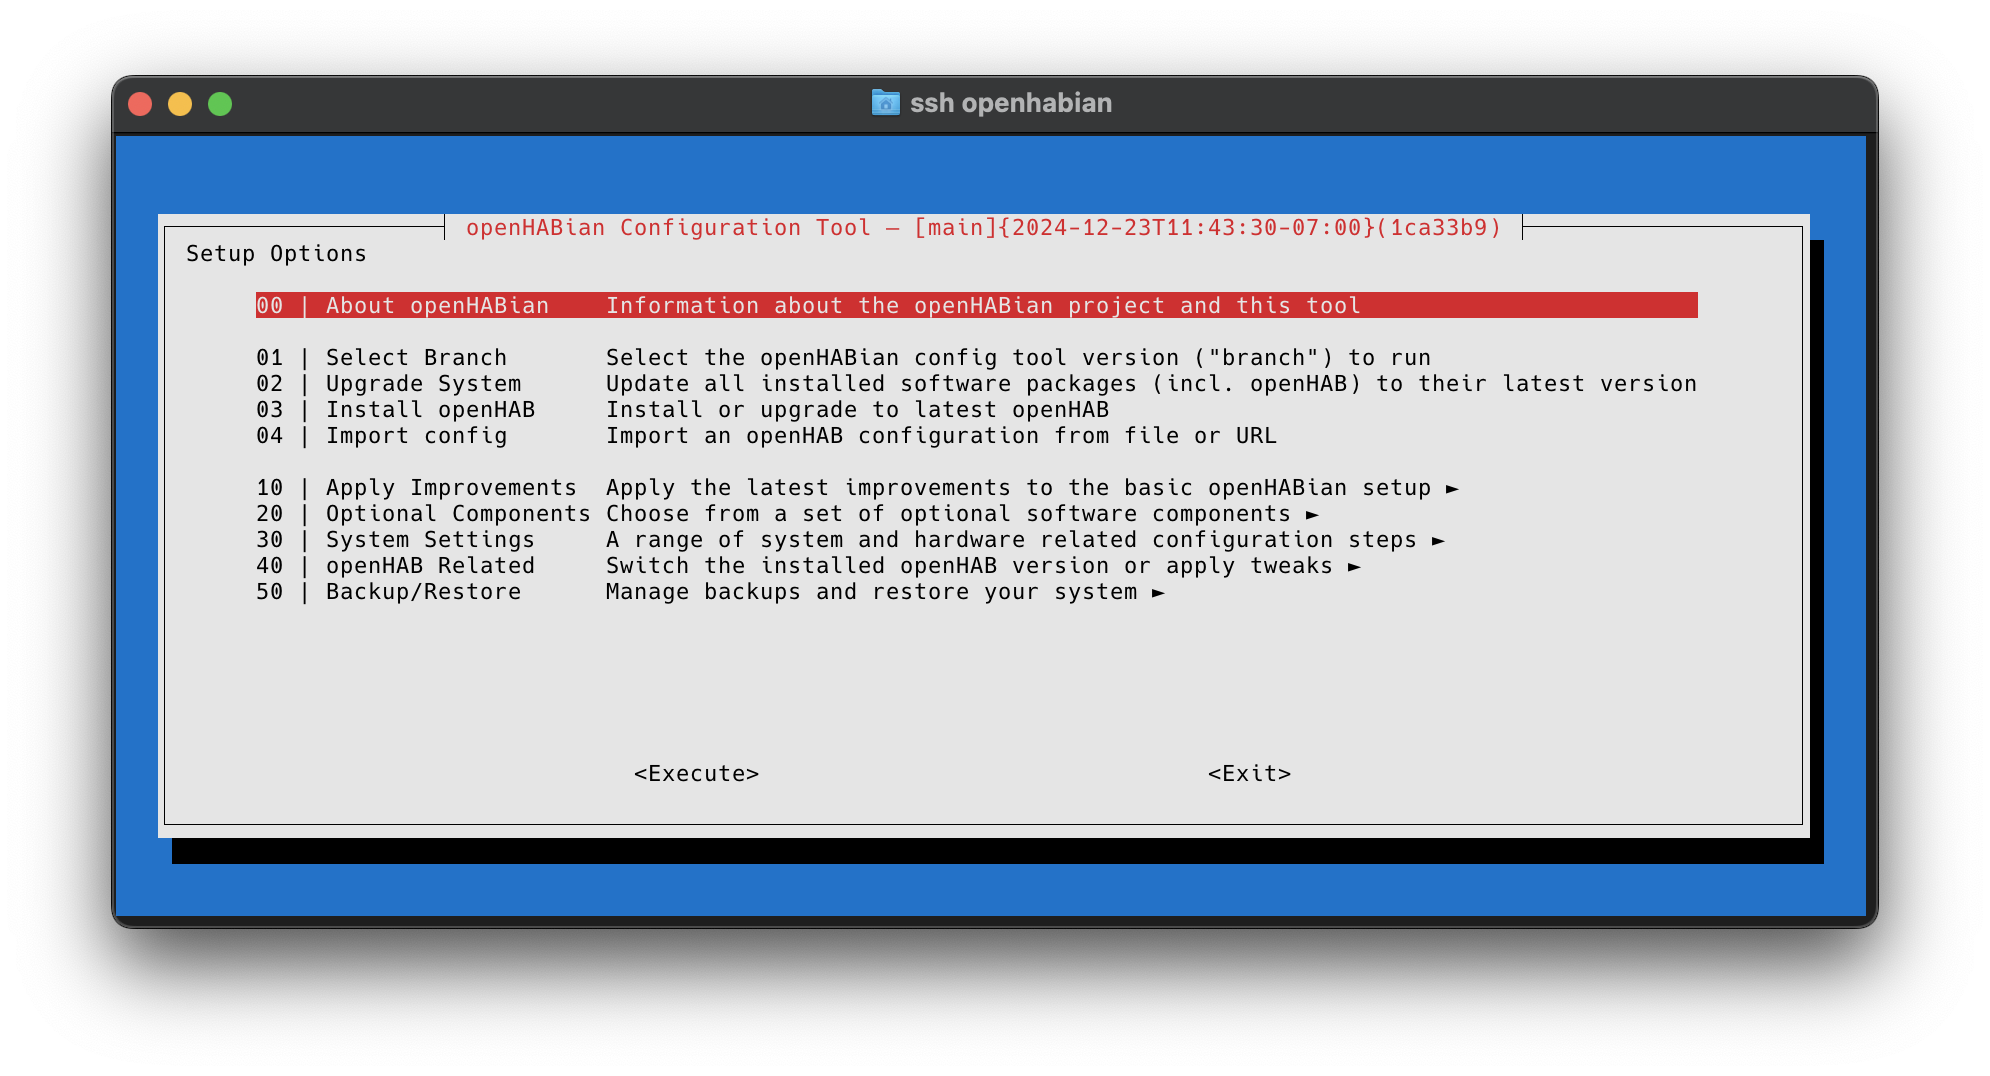
# openHABian Configuration Tool
The following instructions are written for a Raspberry Pi but should be applicable to all openHABian environments. Once connected to the command line console of your system, please execute the openHABian configuration tool by typing the following command:
Hint
sudo executes a command with elevated rights and will hence ask for your password.
The default password is openhabian.
sudo openhabian-config
The configuration tool is the heart and center of openHABian.
A quick note on menu navigation:
Use the cursor keys to navigate, Enter to execute, Space to select and Tab to jump to the actions on the bottom of the screen. Press Esc twice to exit the configuration tool.
# Settings to Adjust
We try to setup everything for you so that you don't have to do any additional configuration if you don't want to, however there are a couple things that sometimes don't quite work so it is always good to double check them:
- Timezone: Your timezone is typically set by your network, but if it appears to be the wrong time you can use menu option 33 to set it manually.
- Language: By default we set the
localesetting toen_US.UTF8as this tends to be the best for error messages, it can be changed using menu option 32. - Passwords: You should change the default password using menu option 34.
NOTE: You should have been configuring timezone and locale at installation time via openhabian.conf settings.
# Default Passwords
For reference, the default username and passwords are as follows:
- Main user (e.g.
sshorsudo):openhabian:openhabian - Samba share:
openhabian:openhabian - openHAB remote console:
openhab:habopen
# Actually Using openHAB
By this point, you should already have a fully functional openHAB setup running on your system. See Getting Started - First Steps for what to do next with openHAB.
# First Steps with Linux
You may be thinking that this computer is a little different than your typical desktop machine. That is because this machine runs on Linux, if you want more information on how to do things on a headless Linux system check out some of the resources linked below.
- "Learn the ways of Linux-fu, for free." at linuxjourney.com (opens new window)
- "Now what?" what to do with the terminal at linuxcommand.org (opens new window)
- Raspberry Pi official documentation at raspberrypi.org (opens new window)
# Additional Optional Components
There are a number of additional tools included with openHABian to enable additional functionality that can be installed.
Each of these are included as a part of openhabian-config menu option 20.
- InfluxDB and Grafana (opens new window) - Persistence and Graphing at http://openhabian:3000 (opens new window)
- Eclipse Mosquitto (opens new window) - Open Source MQTT v3.1/v3.1.1 Broker
- Node-RED (opens new window) - "Flow-based programming for the Internet of Things" at http://openhabian:1880 (opens new window)
- Homegear (opens new window) - Homematic control unit emulation
- KNXd (opens new window) - KNX daemon running at
224.0.23.12:3671/UDP - OWServer (opens new window) - 1-Wire system of Dallas/Maxim
- FIND (opens new window) - Framework for Internal Navigation and Discovery
- Mi Flora MQTT daemon
- ESPHome Device Builder (opens new window) - Webinterface for easy configuration, installation and updating of ESPHome devices at http://openhabian:6052 (opens new window)
The ESPHome configuration files are secured by the openHABbian backup function.
Please note that automatic updates are not implemented in OpenHABian.
→ to do this, use the openhbaian-config update function in menu 20 - Grott Proxy server for Growatt binding (opens new window)
# First boot configuration
Many settings are configurable prior to the first boot of openHABian by changing the key value pairs in the /boot/openhabian.conf file on the SD card once you have flashed the initial image onto it.
Most notably you should be setting the timezone and locale this way if yours differ from the defaults. Also make sure to read the [Networking] section and eventually preconfigure your Wi-Fi setup before you boot for the first time.
Please note that - in case you use a Windows system for writing the SD card - the /boot/ partition will be mounted to a drive named bootfs. So, e.g. if this drive has the letter D:, /boot/openhabian.conf will be found as D:\openhabian.conf.
The openHABian configuration file uses key value pairs, essentially a list of option=value settings in a plain text file.
All supported options are already in the file but unused options and optional components are commented out by default.
Comments are defined by a # followed by a space, so any line you want to be ignored needs to start with a # (yes the space is important).
If you don't know what an option does, probably don't change it as the default options are usually best.
The available options combined with examples are listed below for convenience:
# System Configuration
# hostname
Set a custom hostname for the system.
Example
hostname="openhabian"
# username
Set a custom primary username for the system.
Example
username="openhabian"
# adminkeyurl
Download a public SSH key from a given URL and authorize the owner of the key to login as the admin user (i.e. the user configured by username).
Example
adminkeyurl="https://example.com/mysshkey.pub"
# timezone
Timezone to set the system to. Typically should be set to your current timezone following the "Region/City" general format, see the Debian documentation for more information.
Example
timezone="America/Denver"
# locales
Set the locales to install for your machine in a space separated list (i.e. the languages to install on system). See the Debian documentation for more information.
Example
locales="en_US.UTF-8 de_DE.UTF-8"
# system_default_locale
Set the default locale for the system. See the Debian documentation for more information.
Example
system_default_locale="en_US.UTF-8"
# ipv6
Enable or disable IPv6 support on your system.
Example
ipv6="enable"
# framebuffer
Enable or disable the Raspberry Pi framebuffer.
Example
framebuffer="enable"
# Wi-Fi Settings
# wifi_ssid
Just the name of your Wi-Fi network that you want to connect to.
Example
wifi_ssid="myWifiNetwork"
# wifi_password
The password for your Wi-Fi network.
Example
wifi_password="mySuperSecretPassword"
# wifi_country
The two letter country code for your current location. Set this according to your current location or you may risk violating regulatory restrctions.
Example
wifi_country="DE"
# openHABian Settings
# repositoryurl
The repository to clone openHABian from. This is typically only used by developers to test changes.
Example
repositoryurl="https://github.com/openhab/openhabian.git"
# clonebranch
The branch of the repository to use for openHABian. Use branch openHAB4 or openHAB3 to get OH 4 or 3 installed right from the start.
Example
clonebranch="openHAB4"
# openhabpkgversion
To install a specific version of openhab and openhab-addons packages, use the package version string. Leaving this empty will install the latest available packages from the release repo.
Example
openhabpkgversion=5.1.2-1
# initialconfig
An initial configuration file to import when setting up openHAB.
This file must be a .zip archive created by openhab-cli backup.
ATTENTION: keep /boot/firmware as the directory if you provide an absolute path.
So use the existing firmware folder in the boot partition (Windows: on the bootfs drive) or create it and place the backup file named initial.zip in that folder.
Example
initialconfig="/boot/firmware/initial.zip"
# debugmode
Debug log level for openHABian, valid options are: off, on (verbose output in log), or maximum (show every command in log).
Example
debugmode="maximum"
# apttimeout
APT timeout to wait for lock when multiple install actions are going on.
Example
apttimeout="60"
# java_opt
Java version to install, valid options are: 17, 21, Temurin17, Temurin21, 11 (legacy)
Example
java_opt="Temurin21"
# Fake Hardware
# hw
Force treating your installation as if it was a specific type of hardware.
Valid Options
pi5pi4pi4_8gbcm4pi400pi3cm3pi3+cm3+pi2pi1cm1pi0pi0wpi0w2x86
Example
hw="pi5"
# hwarch
Force treating your installation as if it was a specific architecture.
Valid Options
x86_64amd64armv6larmv7laarch64arm64
Example
hwarch="x86_64"
# osrelease
Force treating your installation as if it was a specific OS release.
Valid Options
raspiosraspbiandebianubuntustretchbusterbullseyebookwormbionicfocal
Example
osrelease="raspios"
# Other Settings
# zraminstall
Enable or disable ZRAM installation.
Example
zraminstall="enable"
# hotspot
Enable or disable hotspot support when internet is not reachable.
Example
hotspot="enable"
# hotspotpw
Password to connect to the hotspot when internet is not reachable.
Example
hotspotpw="openhabian"
# deconz_install
Enable or disable deCONZ software / Phoscon companion app installation.
Example
deconz_install="enable"
# deconz_port
Set the Phoscon Web UI (HTTP) port provided by deCONZ. Default: 8081.
Example
deconz_port="8081"
# deconz_wsport
Set the deCONZ WebSocket API port. Default: 8088.
Example
deconz_wsport="8088"
# Backup Settings
# backupdrive
Storage device to configure for backup.
Example
backupdrive="/dev/sda"
# storageconfig
Name of the backup configuration to configure for openHAB.
Example
storageconfig="openhab-dir"
# storagedir
Directory to mount the storage device to.
Example
storagedir="/storage"
# storagetapes
The number of Amanda storage tapes to configure for the backup.
Example
storagetapes="15"
# storagecapacity
The capacity of Amanda storage tapes to configure for the backup.
Example
storagecapacity="1024"
# Mail Relay Settings
# adminmail
Mail account to use for the admin account.
Example
adminmail="john.doe@example.com"
# relayuser
User account to use for the from address.
Example
relayuser="john.doe@example.com"
# relaypass
Password to authenticate with the relay service.
Example
relaypass="mySuperSecretPassword"
# smarthost
Host of the mail relay service.
Example
smarthost="smtp.gmail.com"
# smartport
Port to connect to the mail relay service.
Example
smartport="587"
# Tailscale Settings
# preauthkey
A pre-configured key to connect to your tailscale network.
Example
preauthkey="tskey-xxxxxxxxxxxxxxxxx"
# tstags
Tags for the machine corresponding to the tailscale network.
Example
tstags="tag:client"