# Google Assistant Action
Google Assistant is Google’s virtual personal assistant and uses Actions on Google as the platform for "Actions" (software applications) to extend the functionality of the Google Assistant. Users engage Google Assistant in conversation to get things done, like controlling their devices and things at home. You can use the officially certified openHAB Action for Google Assistant to easily manage and control your smart home by conversational experiences between you and your openHAB smart home powered by voiced commands.
This guide describes step by step how to use the openHAB Google Assistant Smart Home Action (opens new window). The openHAB Action links your openHAB setup through the myopenHAB.org (opens new window) cloud service to the Google Assistant platform (for technical insights, please refer to this guide (opens new window) to read more about setup options and development information).
With the Action you can voice control your openHAB items and it supports lights, plugs, switches, thermostats and many more. The openHAB Action comes with multiple language support like English, German or French language.
Note
Please be aware that the graphical user interface in the Google Home app or on Google Nest devices may not fully support interaction with some of the supported device types. We cannot influence this and rely on Google to implement user interfaces for more devices. Nevertheless, interaction via voice or in writing with Google Assistant should always work.
If you have any issues, questions or an idea for additional features, please take a look at the repository on GitHub (opens new window).
- Latest Changes
- General Configuration
- Item Configuration
- Switch
- Light
- Light as Group with separate controls
- Light with Modes support
- Scene
- Outlet, Coffee_Maker, WaterHeater, Fireplace
- Valve
- Sprinkler, Vacuum, Washer, Dishwasher
- Vacuum as Group with advanced functionality
- Washer and Dishwasher as Group with cycle information
- Lock
- SecuritySystem as Switch
- SecuritySystem as Group with advanced functionality
- Camera
- Speaker (volume control only)
- TV
- Fan, Hood, AirPurifier (only on/off or fan speed control)
- Fan, Hood, AirPurifier (extended control options)
- AC_Unit
- Humidifier
- Awning, Blinds, Curtain, Door, Garage, Gate, Pergola, Shutter, Window
- Charger
- TemperatureSensor
- HumiditySensor
- ClimateSensor
- Thermostat
- Sensor
- Additional Configuration
- Setup & Usage of the Google Home App
- Example Voice Commands
- Frequently Asked Question
# Latest Changes
State of this document
This documentation refers to release v5.1.0 (opens new window) of openHAB Google Assistant (opens new window) published on 2026-03-21
# v5.1.0
- Added
Washersupport, including advanced group configuration with cycle information - Improved command validation and state checks (including humidity, rotation and thermostat flows)
- Standardized Google error propagation with
GoogleAssistantErroracross command handling
# v5.0.1
- Added
Humidifierdevice type with humidity control and fan speed support - Added extended
Vacuumdevice with dock, locate, battery status and cycle information - Added Rotation trait (opens new window) support to Awning, Blinds, Curtain, Pergola and Shutter devices
# v4.1.0
- Added
queryOnly=trueoption toSwitchdevices indicating that the device can only be queried for state information and not be controlled
# v4.0.0
- Breaking Changes
- Group members are now stored in customData. This means existing (group) devices will only work after a new SYNC
- The
modesconfiguration for Thermostats has been renamed tothermostatModes - The
speedsconfiguration for Fans will be renamed tofanSpeeds - As item types of group members will then be validated, users might see devices disappearing in Google Home if they used an unsupported item within a group device
- Please take a look at Migration Guide (opens new window) and check your configuration against the new constraints
- More details and other changes
- Item names for group members will be stored in customData to save a query request to openHAB when executing commands
- For commands that need the current state the query request is still needed (thermostat commands or relative volume)
- Also some other configuration options are stored in customData
- Item types of group members will now be validated
- Add a lot of new functionality to Fan devices (AirPurifier, Fan, Hood)
- OnOff (separate power switch if used as a group)
- FanSpeed (separate fan speed if used as a group)
- Modes (yes, for the first time modes are available)
- SensorState (for FilterLifeTime and PM2.5 - no clue how to query those)
- Add AC Unit device
- Basically just a combination of the extended Fan and the Thermostat with all control and config options of both
- Item names for group members will be stored in customData to save a query request to openHAB when executing commands
- Potential Issues
- As customData is limited to 512 bytes it could be an issue to store very long item names e.g. for devices with a lot of members like thermostat
# v3.9.0
- Prepared available configuration options for the upcoming rollout of v4
- Users can start adjusting their setup to use the new configuration options:
Thermostat:modeshas been renamed tothermostatModesFan:speedshas been renamed tofanSpeeds
# v3.8.0
- Added
colorTemperatureInverted=trueoption toSpecialColorLightallowing users to invert the percentage to Kelvin conversion for thelightColorTemperatureitem
# v3.7.0
- Adjusted
Fanto usesupportsFanSpeedPercentoption - Inverted
lightColorTemperaturepercentage range when usingcolorUnit="percent"withSpecialColorLight
# v3.6.0
- Added new device types
HumiditySensor&ClimateSensor - Changed trait of
TemperatureSensorto actually show a UI
# v3.5.0
ga="light"forSpecialColorLightis replaced byga="specialcolorlight"useKelvin=trueis replaced bycolorUnit="kelvin"- Support for color temperature in Mired added
# General Configuration
Note
This integration relies on the cloud connector addon. More information can be found in the corresponding docs page (opens new window).
- The openHAB Cloud Connector configured using myopenHAB.org (opens new window) (Items do NOT need to be exposed to and will not show up on myopenHAB.org (opens new window), this is only required for the IFTTT service!)
- A Google account
- A Google Home / Nest Voice Assistant Device or the Google Assistant on your phone
# Item Configuration
To expose items (opens new window) to Google Assistent you will need to add metadata (opens new window) in the ga namespace.
Hint: The value of ga is not case-sensitive.
Currently the following devices are supported (also depending on Google's API capabilities):
# Switch
| Device Type | Switch (opens new window) |
| Supported Traits | OnOff (opens new window) |
| Supported Items | Switch |
| Configuration | (optional) queryOnly=true/false(optional) inverted=true/false(optional) checkState=true/false |
Example:
Switch { ga="Switch" [ inverted=false ] }
# Light
| Device Type | Light (opens new window) |
| Supported Traits | OnOff (opens new window), ColorSetting (opens new window), Brightness (opens new window) (depending on used item type) |
| Supported Items | Switch, Dimmer, Color |
| Configuration | (optional) inverted=true/false(optional) checkState=true/false(optional) colorTemperatureRange="minK,maxK" |
Switch { ga="Light" [ inverted=true ] }
Dimmer { ga="Light" }
Color  { ga="Light" [ colorTemperatureRange="2000,9000" ] }
# Light as Group with separate controls
| Device Type | Light (opens new window) |
| Supported Traits | OnOff (opens new window), ColorSetting (opens new window), Brightness (opens new window) |
| Supported Items | Group as SpecialColorLight with the following members:(optional) Number or Dimmer as lightBrightness(optional) Number or Dimmer as lightColorTemperature(optional) Color as lightColor(optional) Switch as lightPower |
| Configuration | (optional) colorUnit="percent/kelvin/mired"(optional) checkState=true/false(optional) colorTemperatureRange="minK,maxK"(optional) colorTemperatureInverted=true/false |
Important Hint: If you want to use lightColorTemperature, you must either set colorUnit to kelvin or mired or define a colorTemperatureRange, because colorUnit defaults to percent.
If you use colorUnit as percentage values, the lowest color temperature (warm light) will be converted to 0%, and correspondingly the highest color temperature (cold light) will be converted to 100%.
If you need the inverted values for your device, you can set colorTemperatureInverted=true. This will convert low Kelvin values to high percentage values and vice versa.
Group  lightGroup { ga="SpecialColorLight" [ colorUnit="kelvin", colorTemperatureRange="2000,9000" ] }
Switch powerItem            (lightGroup) { ga="lightPower" }
Dimmer brightnessItem       (lightGroup) { ga="lightBrightness" }
Color  colorItem            (lightGroup) { ga="lightColor" }
Number colorTemperatureItem (lightGroup) { ga="lightColorTemperature" }
Example of a light device where low Kelvin values (warm light) are represented by high percentage values in the color temperature item:
Group  lightGroup { ga="SpecialColorLight" [ colorUnit="percent", colorTemperatureRange="2000,6500", colorTemperatureInverted=true ] }
Dimmer brightnessItem       (lightGroup) { ga="lightBrightness" }
Dimmer colorTemperatureItem (lightGroup) { ga="lightColorTemperature" }
In case you want to control multiple lights using one device with Google Assistant, you can apply the following pattern:
Group        lightGroup { ga="SpecialColorLight" [ colorUnit="kelvin", colorTemperatureRange="2000,9000" ] }
Group:Switch powerItems      (lightGroup) { ga="lightPower" }
Group:Dimmer brightnessItems (lightGroup) { ga="lightBrightness" }
Group:Color  colorItems      (lightGroup) { ga="lightColor" }
...
Switch powerItem1            (powerItems)
Switch powerItem2            (powerItems)
...
Dimmer brightnessItem1       (brightnessItems)
Dimmer brightnessItem2       (brightnessItems)
...
Color colorItem1             (colorItems)
Color colorItem2             (colorItems)
...
# Light with Modes support
| Device Type | Light (opens new window) |
| Supported Traits | Modes (opens new window) |
| Supported Items | Switch, Dimmer, Number, String, Color, Rollershutter, Player (static modes) Group with modesCurrentMode and modesSettings members (dynamic modes) |
| Configuration | (required) mode="ModeName,ModeAlias"(required) settings="value1=Name1:Synonym1,value2=Name2" (static) or modesSettings member (dynamic)(optional) lang="en"(optional) ordered=true/false |
Any item with ga="Light" extended with mode and settings configuration options will present a Light device with the Modes (opens new window) trait.
The item's state value is used directly as the mode setting key when executing a command.
mode is a comma-separated list of names for the mode — the first entry is the mode key used internally, any additional entries are treated as synonyms.
settings is a comma-separated list of value=Name:Synonym pairs, where value is the raw state value sent to/read from the openHAB item.
For Group-based lights with dynamic mode settings (where available modes are read from an openHAB item at runtime), use a Group with a modesSettings string member encoding the available settings, and a modesCurrentMode member holding the current setting.
# Static modes: item state maps directly to a mode setting value
String lightModeItem { ga="Light" [ mode="LightEffect,Effect", settings="1=Relax:Warm,2=Focus:Cool,3=Party:RGB", lang="en" ] }

# Dynamic modes: settings are read from a group member at runtime
Group  lightGroup { ga="Light" [ mode="LightEffect,Effect", lang="en" ] }
String currentModeItem (lightGroup) { ga="modesCurrentMode" }
String settingsItem    (lightGroup) { ga="modesSettings" }  # state e.g. "1=Relax:Warm,2=Focus:Cool"
# Scene
| Device Type | Scene (opens new window) |
| Supported Traits | Scene (opens new window) |
| Supported Items | Switch |
| Configuration | (optional) sceneReversible=true/false(optional) checkState=true/false |
Switch { ga="Scene" [ sceneReversible=false ] }
# Outlet, Coffee_Maker, WaterHeater, Fireplace
| Device Type | Outlet (opens new window), Coffee_Maker (opens new window), WaterHeater (opens new window), Fireplace (opens new window) |
| Supported Traits | OnOff (opens new window) |
| Supported Items | Switch |
| Configuration | (optional) inverted=true/false(optional) checkState=true/false |
Switch { ga="Outlet" [ inverted=true ] }
Switch { ga="Coffee_Maker" [ inverted=true ] }
Switch { ga="WaterHeater" [ inverted=false ] }
Switch { ga="Fireplace" }
# Valve
| Device Type | Valve (opens new window) |
| Supported Traits | OpenClose (opens new window) |
| Supported Items | Switch |
| Configuration | (optional) inverted=true/false(optional) checkState=true/false |
Switch { ga="Valve" [ inverted=true ] }
# Sprinkler, Vacuum, Washer, Dishwasher
| Device Type | Sprinkler (opens new window), Vacuum (opens new window) |
| Supported Traits | StartStop (opens new window) |
| Supported Items | Switch |
| Configuration | (optional) inverted=true/false(optional) checkState=true/false |
Switch { ga="Sprinkler" [ inverted=true ] }
Switch { ga="Vacuum" [ inverted=false ] }
Switch { ga="Washer" [ inverted=false ] }
Switch { ga="Dishwasher" [ inverted=false ] }
# Vacuum as Group with advanced functionality
| Device Type | Vacuum (opens new window) |
| Supported Traits | StartStop (opens new window), Dock (opens new window), Locator (opens new window), RunCycle (opens new window), EnergyStorage (opens new window) |
| Supported Items | Group as Vacuum with the following members:(required) Switch as vacuumPower(optional) Switch as vacuumDock(optional) Switch as vacuumLocate(optional) Number or Dimmer as vacuumBattery(optional) String as vacuumCurrentCycle |
| Configuration | (optional) inverted=true/false(optional) checkState=true/false |
Group  vacuumRobot { ga="Vacuum" [ checkState=true ] }
Switch vacuumPowerItem     (vacuumRobot) { ga="vacuumPower" }
Switch vacuumDockItem      (vacuumRobot) { ga="vacuumDock" }
Switch vacuumLocateItem    (vacuumRobot) { ga="vacuumLocate" }
Number vacuumBatteryItem   (vacuumRobot) { ga="vacuumBattery" }
String vacuumCycleItem     (vacuumRobot) { ga="vacuumCurrentCycle" }
# Washer and Dishwasher as Group with cycle information
| Device Type | Washer (opens new window), Dishwasher (opens new window) |
| Supported Traits | StartStop (opens new window), RunCycle (opens new window) |
| Supported Items | Group as Washer or Dishwasher with at least one of the following members:(optional) Switch as washerPower(optional) Number as washerTimerRemaining(optional) String as washerCurrentCycle |
| Configuration | (optional) inverted=true/false(optional) checkState=true/false |
Group  washerDevice { ga="Washer" [ checkState=true ] }
Switch washerPowerItem          (washerDevice) { ga="washerPower" }
Number washerTimerRemainingItem (washerDevice) { ga="washerTimerRemaining" }
String washerCurrentCycleItem   (washerDevice) { ga="washerCurrentCycle" }
You can configure a dishwasher the same way; just change the group metadata to ga="Dishwasher" while keeping the same member tags (washerPower, washerTimerRemaining, washerCurrentCycle).
# Lock
| Device Type | Lock (opens new window) |
| Supported Traits | LockUnlock (opens new window) |
| Supported Items | Contact (no device control), Switch |
| Configuration | (optional) inverted=true/false(optional) checkState=true/false(optional) ackNeeded=true/false(optional) pinNeeded="1234" |
Switch { ga="Lock" [ ackNeeded=true ] }
Switch { ga="Lock" [ pinNeeded="1234" ] }
# SecuritySystem as Switch
| Device Type | SecuritySystem (opens new window) |
| Supported Traits | ArmDisarm (opens new window) |
| Supported Items | Switch |
| Configuration | (optional) inverted=true/false(optional) checkState=true/false(optional) ackNeeded=true/false(optional) pinNeeded="1234"(optional) pinOnDisarmOnly=true/false(optional) waitForStateChange="2" |
When used as a Switch, you will be limited to arming and disarming the system.
See SecuritySystem as Group for explanation on the configuration options.
Google Command: "Hey Google, arm House Alarm" OR "Hey Google, disarm House Alarm".
Switch houseAlarm "House Alarm" { ga="SecuritySystem", pinNeeded="1234" }
# SecuritySystem as Group with advanced functionality
| Device Type | SecuritySystem (opens new window) |
| Supported Traits | ArmDisarm (opens new window) StatusReport (opens new window) |
| Supported Items | Group as SecuritySystem with the following members: Switch as securitySystemArmed(optional) String as securitySystemArmLevel(optional) Switch as securitySystemTrouble(optional) String as securitySystemTroubleCode(optional) Contact as securitySystemZone |
| Configuration | (optional) inverted=true/false(optional) checkState=true/false(optional) ackNeeded=true/false(optional) pinNeeded="1234"(optional) pinOnDisarmOnly=true/false(optional) waitForStateChange="2"(optional) armLevels="L1=Level 1,L2=Level 2"(optional) ordered=true/falseSpecifically on Zone Contacts: (required) zoneType="OpenClose/Motion"(optional) blocking=true/false |
Configuring the SecuritySystem as a Group will enable a lot of advanced functionality.
The Switch and the Group configuration support the following configuration parameters:
checkState=truewill compare the current state with the requested one and responds accordingly.ackNeeded=truewill request an acknowledgement before performing an action.pinNeeded="1234"will request and check the configured PIN before performing an action.pinOnDisarmOnly=truewill enforce the PIN on disarming only. Arming will be done without the PIN.waitForStateChange=0defines the number of seconds to wait for the security system state to update before checking that the arm/disarm was successful. Defaults to 0 if not specified.
When configured as a group, you can add arm levels as well as report errors and get details of zones causing the system to not arm.
armLevels="Key=Label" - The label is used for commanding Google Assistant, the key is the matching value sent to openHAB.
ordered=true - When set together with armLevels, marks the arm levels as ordered, so Google understands their relative ranking.
Google Command: "Hey Google, set House Alarm to Level 1" (L1 sent to item).
When using arm levels, Google will send the mapped level ID (L1,L2 in below example) to the item tagged with securitySystemArmLevel when you use the arm command. It will then use the status of the item securitySystemArmed to confirm that arming was successful.
When arming and not using arm levels or disarming, Google will send ON/OFF to the item tagged securitySystemArmed.
If arming fails and blocking zones have been configured with securitySystemZone and blocking=true, Google will attempt to check for zones that are causing the arming to fail.
ga="securitySystemTrouble" and ga="securitySystemTroubleCode" are used in a StatusReport to report any errors on the alarm, e.g. a flat battery.
Group   gHouseAlarm "House Alarm" { ga="SecuritySystem" [ pinNeeded="1234", armLevels="L1=Level 1,L2=Level 2" ] }
Switch  alarmArmed            (gHouseAlarm) { ga="securitySystemArmed" }
String  alarmArmLevel         (gHouseAlarm) { ga="securitySystemArmLevel" }
Switch  alarmTrouble          (gHouseAlarm) { ga="securitySystemTrouble" }
String  alarmTroubleErrorCode (gHouseAlarm) { ga="securitySystemTroubleCode" }
Contact frontDoorSensor       (gHouseAlarm) { ga="securitySystemZone" [ zoneType="OpenClose", blocking="true" ] }
# Camera
| Device Type | Camera (opens new window) |
| Supported Traits | CameraStream (opens new window) |
| Supported Items | String |
| Configuration | (optional) protocols="hls,dash,smooth_stream,progressive_mp4" (choose suitable) |
String { ga="Camera" [ protocols="hls,dash" ] }
# Speaker (volume control only)
| Device Type | Speaker (opens new window) |
| Supported Traits | Volume (opens new window) |
| Supported Items | Dimmer |
| Configuration | (optional) checkState=true/false(optional) volumeDefaultPercentage="20"(optional) levelStepSize="5"(optional) volumeMaxLevel="100" |
Dimmer { ga="Speaker" [ volumeDefaultPercentage="50", levelStepSize="10", volumeMaxLevel="90" ] }
# TV
| Device Type | TV (opens new window) |
| Supported Traits | OnOff (opens new window), Volume (opens new window), TransportControl (opens new window), InputSelector (opens new window), AppSelector (opens new window), MediaState (opens new window), Channel (opens new window) (when tvChannel member is present) |
| Supported Items | Group as TV with the following members:(optional) Switch as tvPower(optional) Switch as tvMute(optional) Dimmer or Number as tvVolume(optional) String or Number as tvChannel(optional) String or Number as tvInput(optional) String or Number as tvApplication(optional) Player as tvTransport |
| Configuration | (optional) checkState=true/false(optional) volumeDefaultPercentage="20"(optional) levelStepSize="5"(optional) volumeMaxLevel="100"(optional) transportControlSupportedCommands="NEXT,PREVIOUS,PAUSE,RESUME"(optional) availableChannels="channelNumber=channelId=channelName:channelSynonym:...,..."(optional) availableInputs="inputKey=inputName:inputSynonym:...,..."(optional) availableApplications="applicationKey=applicationName:applicationSynonym:...,..."(optional) lang="en" |
Group  tvGroup { ga="TV" [ volumeDefaultPercentage="20", levelStepSize="10", volumeMaxLevel="100", transportControlSupportedCommands="NEXT,PREVIOUS,PAUSE,RESUME", availableChannels="1=Channel1=NBC,2=Channel2=CBS", availableInputs="hdmi1=xbox:gaming,hdmi2=settopbox", availableApplications="spotify=Spotify:Music,netflix=Netflix:Chill" ] }
Switch powerItem       (tvGroup) { ga="tvPower" }
Switch muteItem        (tvGroup) { ga="tvMute" }
Dimmer volumeItem      (tvGroup) { ga="tvVolume" }
String channelItem     (tvGroup) { ga="tvChannel" }
String inputItem       (tvGroup) { ga="tvInput" }
String applicationItem (tvGroup) { ga="tvApplication" }
Player transportItem   (tvGroup) { ga="tvTransport" }
# Fan, Hood, AirPurifier (only on/off or fan speed control)
| Device Type | Fan (opens new window), Hood (opens new window), AirPurifier (opens new window) |
| Supported Traits | OnOff (opens new window), FanSpeed (opens new window) (depending on used item type) |
| Supported Items | Switch (no speed control), Dimmer, Number |
| Configuration | (optional) checkState=true/false(optional) fanSpeeds="0=away:zero,50=default:standard:one,100=high:two"(optional) lang="en"(optional) ordered=true/false |
Fans (and similar device types, like AirPurifier or Hood) support the FanSpeed trait.
If you do not specify the fanSpeeds option, Google will use and expect percentage values for the fan speed.
Otherwise, you will be able to set up and use human speakable modes, e.g. "fast" for 100% or "slow" for 25%.
fanSpeeds will be a comma-separated list of modes, where the mode value corresponds to the speed value to be passed to the device. The mode or value is followed by an equal sign to list different aliases separated by a colon sign.
So in the example stated below both "high" and "two" would set the speed to 100%.
Some devices may expect a specific value instead of a percentage, like "1" or "2" as speed values. In this case, you can adjust the configuration and replace the percentage values with the values that the device expects. (e.g.: fanSpeeds="0=away:zero,1=default:standard:one,2=high:two").
You are also able to define the language of those aliases.
The option ordered will tell the system that your list is ordered and you will then be able to also say "faster" or "slower" and Google will use the next or previous speed.
Dimmer { ga="Fan" [ fanSpeeds="0=away:zero,50=default:standard:one,100=high:two", lang="en", ordered=true ] } # Using specific percentage values for the speed
Switch { ga="Hood" } # No speed control - only on/off
Dimmer { ga="AirPurifier" } # Using percentage values for the speed
Dimmer { ga="AirPurifier" [ fanSpeeds="0=away:zero,1=low:one,2=medium:two,3=high:three,4=turbo:four", lang="en", ordered=true ] } # Using specific speed modes/values, which differ from percentage
Switch { ga="AirPurifier" } # No speed control - only on/off
# Fan, Hood, AirPurifier (extended control options)
| Device Type | Fan (opens new window), Hood (opens new window), AirPurifier (opens new window) |
| Supported Traits | OnOff (opens new window), FanSpeed (opens new window), Modes (opens new window), SensorState (opens new window) |
| Supported Items | Group as Fan, Hood or AirPurifier with the following members:(optional) Switch as fanPower(optional) Dimmer or Number as fanSpeed(optional) Number or String as fanMode(optional) Number as fanFilterLifeTime(optional) Number as fanPM25 |
| Configuration | (optional) checkState=true/false(optional) fanSpeeds="0=away:zero,50=default:standard:one,100=high:two"(optional) fanModeName="OperationMode,Modus"(optional) fanModeSettings="1=Low:Silent,2=Normal,3=High:Night"(optional) lang="en"(optional) ordered=true/false |
When configuring a Fan (or similar device) as a group with the above listed members, you will gain more options to control the device. In addition to control power and speeds, you will also be able to set modes and query sensor information (if supported by Google).
For more information on the fanSpeeds configuration option, please take a look at the simple Fan device type.
With the fanModeName and fanModeSettings you can control specific modes. Currently, one mode type per device is supported that you can configure with a name and a list of settings. The first entry in the names field is used internally while any other following separated by comma will be a synonym to be used in commands. The settings list is a comma-separated list of value=name pairs. The name can also contain synonyms separated by a colon. In the listed example you could then say "Set OperationMode to Normal".
Hint: At the moment, sensor values will only be queriable by voice and will not show up anywhere in the Google Home app.
Group  fanGroup { ga="Fan" [ fanSpeeds="0=away:zero,50=default:standard:one,100=high:two", fanModeName="OperationMode,Modus", fanModeSettings="1=Silent,2=Normal,3=Night", lang="en", ordered=true ] }
Switch powerItem    (fanGroup) { ga="fanPower" }
Dimmer speedItem    (fanGroup) { ga="fanSpeed" }
String modeItem     (fanGroup) { ga="fanMode" }
Number lifetimeItem (fanGroup) { ga="fanFilterLifeTime" }
Number pm25Item     (fanGroup) { ga="fanPM25" }
# AC_Unit
| Device Type | AC_Unit (opens new window) |
| Supported Traits | OnOff (opens new window), FanSpeed (opens new window), TemperatureSetting (opens new window), Modes (opens new window), SensorState (opens new window) |
| Supported Items | Group as AC_Unit with the following members:(optional) Switch as fanPower(optional) Dimmer or Number as fanSpeed(optional) Number or String as fanMode(optional) Number as fanFilterLifeTime(optional) Number as fanPM25(optional) Number as thermostatTemperatureAmbient(optional) Number as thermostatTemperatureSetpoint(optional) Number as thermostatTemperatureSetpointLow(optional) Number as thermostatTemperatureSetpointHigh(optional) Number as thermostatHumidityAmbient(optional) String or Number or Switch as thermostatMode |
| Configuration | (optional) checkState=true/false(optional) fanSpeeds="0=away:zero,50=default:standard:one,100=high:two"(optional) fanModeName="OperationMode,Modus"(optional) fanModeSettings="1=Low:Silent,2=Normal,3=High:Night"(optional) useFahrenheit=true/false(optional) maxHumidity=1-100(optional) thermostatTemperatureRange="10,30"(optional) thermostatModes="off=OFF:WINDOW_OPEN,heat=COMFORT:BOOST,eco=ECO,on=ON,auto"(optional) lang="en"(optional) ordered=true/false |
The AC_Unit device is basically the combination of the Fan and the Thermostat device. For explanation on configuration options please take a look at both of them.
Group  acunitGroup { ga="AC_Unit" [ fanSpeeds="0=null:off,50=slow,100=full:fast", fanModeName="OperationMode,Modus", fanModeSettings="1=Silent,2=Normal,3=Night", thermostatModes="off=OFF:WINDOW_OPEN,heat=COMFORT:BOOST,eco=ECO,on=ON,auto", thermostatTemperatureRange="10,30", useFahrenheit=false, lang="en", ordered=true ] }
Switch powerItem        (acunitGroup) { ga="fanPower" }
Dimmer speedItem        (acunitGroup) { ga="fanSpeed" }
String modeItem         (acunitGroup) { ga="fanMode" }
Number lifetimeItem     (acunitGroup) { ga="fanFilterLifeTime" }
Number pm25Item         (acunitGroup) { ga="fanPM25" }
Number ambientItem      (acunitGroup) { ga="thermostatTemperatureAmbient" }
Number humidityItem     (acunitGroup) { ga="thermostatHumidityAmbient" }
Number setpointItem     (acunitGroup) { ga="thermostatTemperatureSetpoint" }
Number setpointItemLow  (acunitGroup) { ga="thermostatTemperatureSetpointLow" }
Number setpointItemHigh (acunitGroup) { ga="thermostatTemperatureSetpointHigh" }
String modeItem         (acunitGroup) { ga="thermostatMode" }
# Humidifier
| Device Type | Humidifier (opens new window) |
| Supported Traits | OnOff (opens new window) (all devices), HumiditySetting (opens new window) (Dimmer/Number items and Groups with humidity setpoint), FanSpeed (opens new window) (Groups with fan speed member) |
| Supported Items | Switch (on/off only), Dimmer, Number, or Group as Humidifier with the following members:(optional) Switch as humidifierPower(optional) Number or Dimmer as humidifierHumiditySetpoint(optional) Number as humidifierHumidityAmbient(optional) Number or Dimmer as humidifierFanSpeed |
| Configuration | (optional) inverted=true/false(optional) checkState=true/false(optional) maxHumidity=1-100(optional) humidityRange="30,80"(optional) fanSpeeds="low=Low:Slow,high=High:Fast"(optional) ordered=true/false(optional) lang="en" |
For simple humidifiers, you can use:
- Switch: Basic on/off control only (no humidity percentage)
- Dimmer/Number: Full humidity control with setpoint
For advanced functionality, use a Group with specific members.
maxHumidity=100defines the maximum value of your humidity items if they don't use percentage (0-100). For example, if your sensor reports 0.0-1.0, setmaxHumidity=1.humidityRange="30,80"defines the supported humidity range for the setpoint (defaults to 0-100%).fanSpeedsallows you to define named fan speeds with synonyms.
Google Commands: "Hey Google, turn on the humidifier", "Hey Google, set humidifier to 60 percent" (Dimmer/Number/Group only), "Hey Google, set humidifier fan speed to high" (Group with fan speed only).
# Simple humidifier
Switch { ga="Humidifier" }
Dimmer { ga="Humidifier" [ maxHumidity=1 ] }

# Advanced humidifier with humidity control and fan speed
Group  humidifierGroup { ga="Humidifier" [ humidityRange="30,80", fanSpeeds="low=Low:Slow,high=High:Fast", maxHumidity=100 ] }
Switch humidifierPowerItem     (humidifierGroup) { ga="humidifierPower" }
Number humidifierSetpointItem  (humidifierGroup) { ga="humidifierHumiditySetpoint" }
Number humidifierAmbientItem   (humidifierGroup) { ga="humidifierHumidityAmbient" }
Dimmer humidifierFanSpeedItem  (humidifierGroup) { ga="humidifierFanSpeed" }
# Awning, Blinds, Curtain, Door, Garage, Gate, Pergola, Shutter, Window
| Device Type | Awning (opens new window), Blinds (opens new window), Curtain (opens new window), Door (opens new window), Garage (opens new window), Gate (opens new window), Pergola (opens new window), Shutter (opens new window), Window (opens new window) |
| Supported Traits | OpenClose (opens new window), StartStop (opens new window), Rotation (opens new window) (awning, blinds, curtain, pergola, shutter - requires group configuration) |
| Supported Items | Contact (no device control), Switch (no open percentage), Rollershutter, Group (for rotation support) |
| Configuration | (optional) discreteOnly=true/false(optional) queryOnly=true/false(optional) inverted=true/false(optional) checkState=true/falseRotation Support (Groups with shutterRotation only): (optional) supportsDegrees=true/false (default: true)(optional) supportsContinuousRotation=true/false (default: false)(optional) rotationDegreesRange="min,max" (default: "0,90") |
Blinds and similar devices should always use the Rollershutter item type for proper functionality.
Since Google and openHAB use the opposite percentage value for "opened" and "closed", the action will translate this automatically.
If the values are still inverted in your case, you can state the inverted=true option for all Rollershutter items.
Since Google only tells the open percentage (and not the verb "close" or "down"), it can not be differentiated between saying "set blind to 100%" or "open blind". Therefore, it is not possible to "not invert" the verbs, if the user chooses to invert the numbers.
# Rotation Support for Awning, Blinds, Curtain, Pergola, and Shutter
Awnings, blinds, curtains, pergolas, and shutters support the Rotation trait (opens new window), allowing control of slat tilt/rotation in addition to opening/closing. This feature is only available for group-based configurations with separate position and rotation controls.
Group Configuration for Rotation: For devices with separate items for position and rotation control:
Group blindsGroup { ga="Blinds" }
  Rollershutter blindsPosition  { ga="shutterPosition" }
  Number        blindsRotation  { ga="shutterRotation" }
Voice Commands:
- "Open the shutters to 50%"
- "Tilt the shutters to 30 degrees"
- "Set the blinds to 75%"
- "Rotate the blinds to 45 degrees"
Group Members:
shutterPosition: Controls the opening/closing position (Rollershutter, Dimmer, Number)shutterRotation: Controls the slat rotation/tilt (Rollershutter, Dimmer, Number)
Configuration Options: The rotation trait supports the following optional configuration parameters:
supportsDegrees=true/false(default: true) - Enable degree-based control (percentage is always supported)- Set to
falseif you only want percentage-based control without degree conversion
- Set to
supportsContinuousRotation=true/false(default: false) - Enable continuous rotation beyond limitsrotationDegreesRange="min,max"(default: "0,90") - Rotation range in degrees as comma-separated values (only used when supportsDegrees is true)
Note
openHAB items always store rotation as percentages (0-100). When supportsDegrees=true, the percentage is converted to/from degrees using the configured range for Google Assistant commands and state responses.
Group shutterGroup { ga="Shutter" [ rotationDegreesRange="-45,45" ] }
  Rollershutter shutterPosition  { ga="shutterPosition" }
  Number        shutterRotation  { ga="shutterRotation" }

# Example with continuous rotation support
Group blindsGroup { ga="Blinds" [ supportsContinuousRotation=true, rotationDegreesRange="0,360" ] }
  Rollershutter blindsCover     { ga="shutterPosition" }
  Number        blindsRotation  { ga="shutterRotation" }

# Example with percentage-only control (no degree conversion)
Group awningGroup { ga="Awning" [ supportsDegrees=false ] }
  Rollershutter awningPosition  { ga="shutterPosition" }
  Dimmer        awningSlats     { ga="shutterRotation" }
Basic Examples:
# Simple devices (no rotation)
Rollershutter { ga="Awning" }
Rollershutter { ga="Blinds" [ inverted=true ] }
Rollershutter { ga="Curtain" }
Switch        { ga="Door" }
Rollershutter { ga="Garage" }
Contact       { ga="Gate" }
Rollershutter { ga="Pergola" }
Rollershutter { ga="Shutter" }
Rollershutter { ga="Window" }

# Advanced devices with rotation support
Group shutterGroup { ga="Shutter" }
  Rollershutter ShutterPosition  { ga="shutterPosition" }
  Number        ShutterTilt      { ga="shutterRotation" }

Group blindsGroup { ga="Blinds" [ rotationDegreesRange="0,180" ] }
  Rollershutter blindsPosition  { ga="shutterPosition" }
  Rollershutter blindsSlats     { ga="shutterRotation" }
# Charger
| Device Type | Charger (opens new window) |
| Supported Traits | EnergyStorage (opens new window) |
| Supported Items | Group as Charger with the following members:(optional) Switch as chargerCharging(optional) Switch as chargerPluggedIn(optional) Number or Dimmer as chargerCapacityRemaining(optional) Number or Dimmer as chargerCapacityUntilFull |
| Configuration | (optional) checkState=true/false(optional) isRechargeable=true/false(optional) unit="PERCENTAGE" |
The configuration option unit supports the following values: PERCENTAGE (default), SECONDS, MILES, KILOMETERS, KILOWATT_HOURS
The setting isRechargeable defaults to false if not explicitly set to true.
If no chargerCharging item is specified, the device will only support queries.
Group  chargerGroup { ga="Charger" [ isRechargeable=true, unit="KILOWATT_HOURS" ] }
Switch chargingItem         (chargerGroup) { ga="chargerCharging" }
Switch pluggedInItem        (chargerGroup) { ga="chargerPluggedIn" }
Number capacityRemainItem   (chargerGroup) { ga="chargerCapacityRemaining" }
Number capacityFullItem     (chargerGroup) { ga="chargerCapacityUntilFull" }
# TemperatureSensor
| Device Type | Sensor (opens new window) |
| Supported Traits | TemperatureControl (opens new window), TemperatureSetting (opens new window) |
| Supported Items | Number |
| Configuration | (optional) useFahrenheit=true/false(optional) temperatureRange="-10,50" |
By default, the temperature range of a temperature sensor is set to -100 °C to 100 °C.
The reported state values have to fall into that range!
If you need to adjust the range, please add the config option temperatureRange="-20,40" to the item. Keep in mind that those values always have to be provided in Celsius!
Hint: At the moment, sensor values will only be queriable by voice and will not show up anywhere in the Google Home app.
Number { ga="TemperatureSensor" [ useFahrenheit=true, temperatureRange="-20,40" ] }
# HumiditySensor
| Device Type | Sensor (opens new window) |
| Supported Traits | HumiditySetting (opens new window) |
| Supported Items | Number |
| Configuration | (optional) maxHumidity=1-100 |
Number { ga="HumiditySensor" }
# ClimateSensor
| Device Type | Sensor (opens new window) |
| Supported Traits | HumiditySetting (opens new window), TemperatureControl (opens new window), TemperatureSetting (opens new window) |
| Supported Items | Group as ClimateSensor with the following members:(optional) Number as humidityAmbient(optional) Number as temperatureAmbient |
| Configuration | (optional) useFahrenheit=true/false(optional) maxHumidity=1-100(optional) temperatureRange="-10,50" |
By default, the temperature range of a climate sensor is set to -100 °C to 100 °C.
The reported state values have to fall into that range!
If you need to adjust the range, please add the config option temperatureRange="-20,40" to the item. Keep in mind that those values always have to be provided in Celsius!
Group  sensorGroup { ga="ClimateSensor" [ useFahrenheit=true, temperatureRange="0,40" ] }
Number temperatureItem (sensorGroup) { ga="temperatureAmbient" }
Number humidityItem    (sensorGroup) { ga="humidityAmbient" }
# Thermostat
| Device Type | Thermostat (opens new window) |
| Supported Traits | TemperatureSetting (opens new window) |
| Supported Items | Group as Thermostat with the following members(optional) Number as thermostatTemperatureAmbient(optional) Number as thermostatTemperatureSetpoint(optional) Number as thermostatTemperatureSetpointLow(optional) Number as thermostatTemperatureSetpointHigh(optional) Number as thermostatHumidityAmbient(optional) String or Number or Switch as thermostatMode |
| Configuration | (optional) checkState=true/false(optional) useFahrenheit=true/false(optional) maxHumidity=1-100(optional) thermostatTemperatureRange="10,30"(optional) thermostatModes="off=OFF:WINDOW_OPEN,heat=COMFORT:BOOST,eco=ECO,on=ON,auto" |
Thermostat requires a group of items to be properly configured to be used with Google Assistant. The default temperature unit is Celsius.
To change the temperature unit to Fahrenheit, add the config option useFahrenheit=true to the thermostat group.
To set the temperature range your thermostat supports, add the config option thermostatTemperatureRange="10,30" to the thermostat group. Those values always have to be provided in Celsius!
If your thermostat supports a range for the setpoint you can use both thermostatTemperatureSetpointLow and thermostatTemperatureSetpointHigh instead of the single thermostatTemperatureSetpoint item.
If your thermostat does not have a mode, you should create one and manually assign a value (e.g. heat, cool, on, etc.) to have proper functionality.
To map the default thermostat modes of Google (opens new window) (on, off, heat, cool, etc.) to custom ones for your specific setup, you can use the thermostatModes config option on the thermostat group.
E.g. [ thermostatModes="off=OFF:WINDOW_OPEN,heat=COMFORT:BOOST,eco=ECO,on=ON,auto" ] will enable the following five modes in Google Home "off, heat, eco, on, auto" that will be translated to "OFF, COMFORT, ECO, ON, auto". You can specify alternative conversions using the colon sign, so that in the former example "BOOST" in openHAB would also be translated to "heat" in Google. For the translation of Google modes to openHAB always the first option after the equal sign is used.
By default, the integration will provide "off,heat,cool,on,heatcool,auto,eco".
You can also set up a Thermostat for using it as a temperature sensor. To do so, create a Thermostat group and only add one item member as "thermostatTemperatureAmbient".
However, it is recommended to prefer the TemperatureSensor type for simple temperature reports (but currently there is no UI support in Google Home).
Group  thermostatGroup { ga="Thermostat" [ thermostatModes="off=OFF:WINDOW_OPEN,heat=COMFORT:BOOST,eco=ECO,on=ON,auto", thermostatTemperatureRange="10,30", useFahrenheit=false ] }
Number ambientItem      (thermostatGroup) { ga="thermostatTemperatureAmbient" }
Number humidityItem     (thermostatGroup) { ga="thermostatHumidityAmbient" }
Number setpointItem     (thermostatGroup) { ga="thermostatTemperatureSetpoint" }
Number setpointItemLow  (thermostatGroup) { ga="thermostatTemperatureSetpointLow" }
Number setpointItemHigh (thermostatGroup) { ga="thermostatTemperatureSetpointHigh" }
String modeItem         (thermostatGroup) { ga="thermostatMode" }
# Sensor
| Device Type | Sensor (opens new window) |
| Supported Traits | SensorState (opens new window) |
| Supported Items | Number, String, Dimmer, Switch, Rollershutter, Contact |
| Configuration | sensorName="SmokeLevel"valueUnit="PARTS_PER_MILLION"states="no smoke=10,smoke detected=50,high=90" |
Please see the SensorState documentation (opens new window) for more details on configuration options. For now only exact matches of the numeric value will report the descriptive state value.
Number { ga="Sensor" [ sensorName="AirQuality", valueUnit="AQI", states="good=10,moderate=50,poor=90" ] }
# Additional Configuration
Item labels are not mandatory in openHAB, but for the Google Assistant Action they are absolutely necessary!
It is the "label text" (e.g. "Kitchen Lights" for example above) and not the item's name that will be available to you via voice commands or in the Google Home app, so make it unique and easy to say!
If you do not want to adjust your labels to be human spellable, you can use the "name" config option in the metadata: [ name="Kitchen Lights" ]. This will overwrite the label as the device's name.
Furthermore, you can state synonyms for the device name: Switch KitchenLight "Kitchen Lights" { synonyms="Top Light", ga="Light" }.
To ease setting up new devices you can add a room hint: [ roomHint="Living Room" ] or a structure hint: [ structureHint="My Home" ].
For devices supporting the OnOff trait, the attribute [ queryOnly=true ] can be configured.
For devices supporting the OpenClose trait, the attributes [ queryOnly=true, discreteOnly=true ] can be configured.
queryOnlydefaults tofalse. Is set totrueforContactitems. Indicates if the device can only be queried for state information and cannot be controlled. Sensors that can only report open state should set this field totrue.discreteOnlydefaults tofalse. When set totrue, this indicates that the device must either be fully open or fully closed (that is, it does not support values between 0% and 100%). An example of such a device may be a valve.
All device types support checking the current state before sending an updated state by a command. This can be enabled by setting [ checkState=true ] in the metadata. When this is enabled, the current state of the target item is queried and compared to the potential new state triggered by the command. If it is identical, a special error message is triggered and communicated to the user.
NOTE: metadata is not available via paperUI in openHAB v2. Either you create your items via ".items" files, or you can:
add metadata via console:
smarthome:metadata add BedroomLights ga Lightadd metadata using the REST API:
PUT /rest/items/BedroomLights/metadata/ga

{
  "value": "Light"
}
# Two-Factor-Authentication
For some actions, Google recommends to use TFA (Two-Factor-Authentication) to prevent accidental or unauthorized triggers of sensitive actions. See Two-factor authentication | Actions on Google Smart Home (opens new window).
The openHAB Google Assistant integration supports both ackNeeded and pinNeeded. You can use both types on all devices types and traits.
ackNeeded: "A two-factor authentication that requires explicit acknowledgement (yes or no) and can also use trait states as response feedback. This challenge type is not recommended for security devices and traits."
pinNeeded: "A two-factor authentication that requires a personal identification number (PIN), which is ideal for security devices and traits."
Example:
Switch DoorLock   "Front Door"  { ga="Lock" [ ackNeeded=true ] }
Switch HouseAlarm "House Alarm" { ga="SecuritySystem" [ pinNeeded="1234" ] }
# Setup & Usage of the Google Home App
- Make sure Google Play Services is up to date.
- Visit "Google Home" app entry in Google Play Store on Android.
- Set up the voice-activated speaker or Android phone (version 6+) with your Google account.
- Make sure you're the correct user.
- Start the Google Home app on your phone.
- Go to the settings part:
Home > Settings.
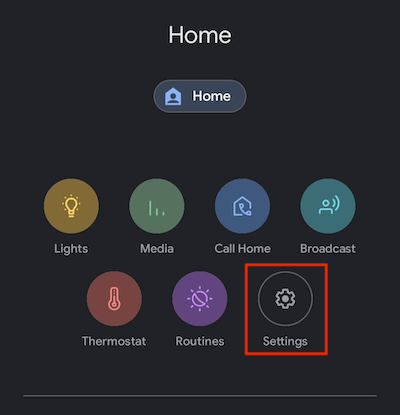
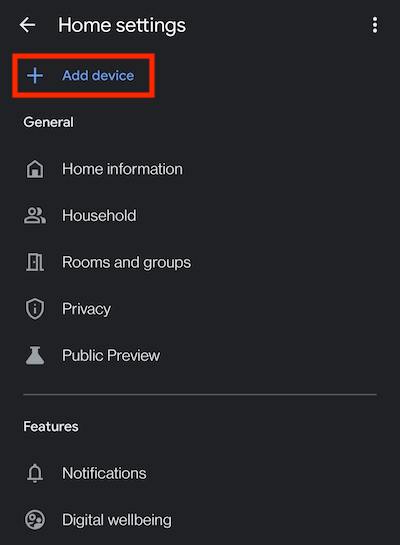
- Press the
+ Add devicebutton in the Settings screen.
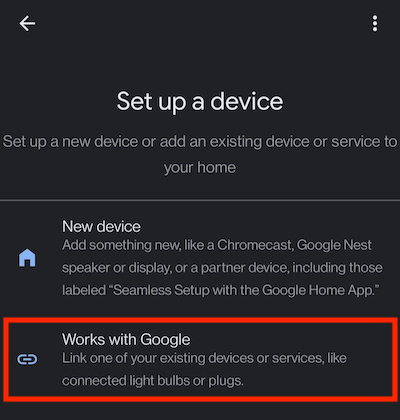
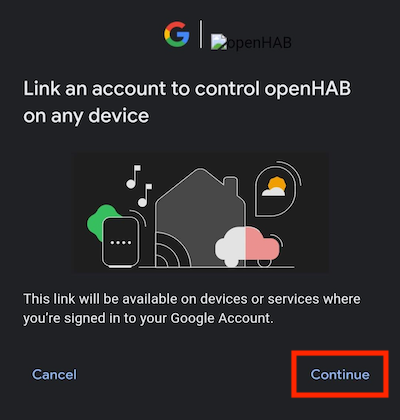
- Choose
Works with Google
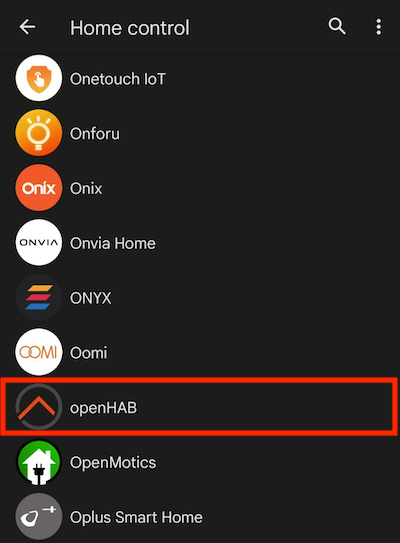
- Search and select
openHAB.
- Continue with linking your account.
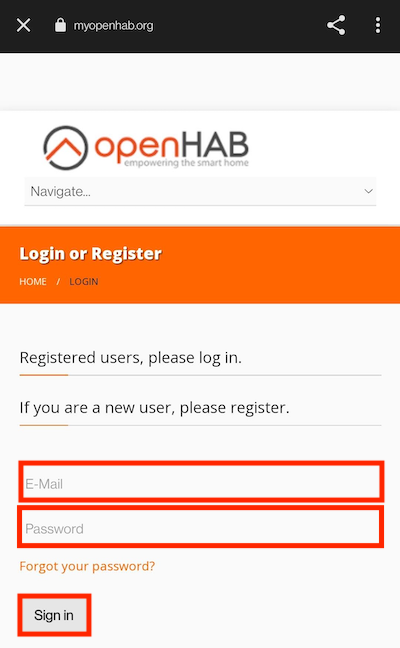
- Login at
myopenhab.orgwith your username and password.
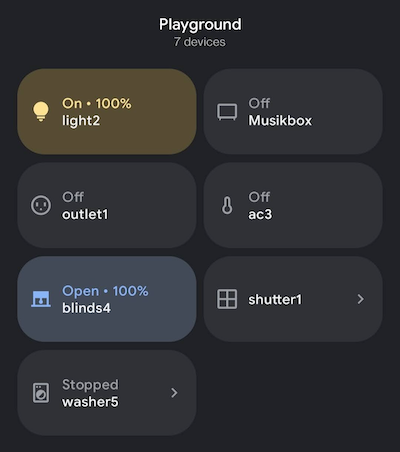
- Make sure to assign your devices to rooms to properly use voice commands.
- You can now control your devices from the Google Assistant and Google Home.
# Example Voice Commands
Here are some example voice commands:
- Turn on Office Lights.
- Dim/Brighten Office Lights (increments 15%).
- Set Office Lights to 35%.
- Open/Close the blinds
- Turn off Pool Waterfall.
- Turn on House Fan.
- Turn on Home Theater Scene.
- Set Basement Thermostat to 15 degrees.
- What is the current Basement Thermostat Temperature?
# Frequently Asked Question
My New items did not appear in the Google Home app.
- Say:
Hey Google, sync my devices
I'm not able to connect openHAB to Google Home.
Check, recheck and after that check again your items!
The items that you want to expose to Google Assistant should have the right metadata assigned.
The items that you want to expose to Google Assistant must have a item label! Item Definition and Syntax (opens new window)
If none of the above solutions works for you:
- Remove all the metadata.
- Make a new .item file with 1 item to expose.
Switch TestSwitch "Test Switch" { ga="Switch" }- Relink your account.